Monday, January 3, 2011

Before and After: Living Room Drapes

I finished a work in progress this week- yea!! When we bought this house, the main level was painted beige and we had these lovely (also beige) linen-look drapes in the living room. Here's what the house looked like when we moved in.


Living room before


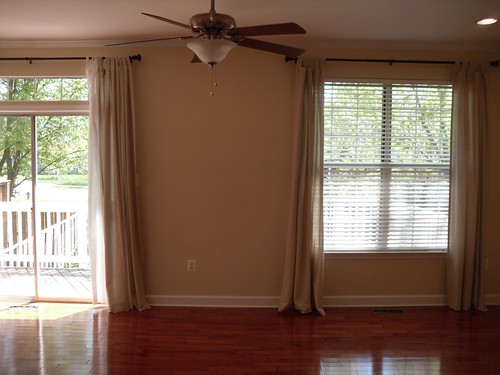
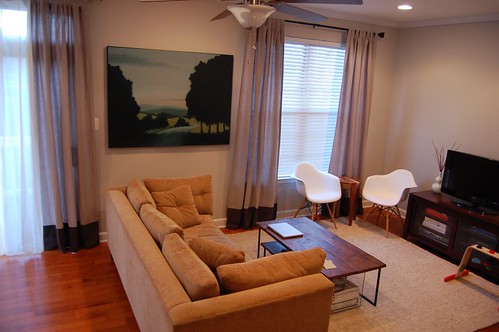
Then we had that AWESOME water leak that basically destroyed our house a few months ago. And thanks to that water leak, we got all new wood floors and a new coat of paint through the whole main floor. We chose a grey color, Olympic Grey Ghost. But the beige drapes had to go. And they are LONG drapes, almost 100 inches each. Do you know how hard it is to find long drapes in a color you like for a price you can afford? And do you know how expensive drapery fabric is? So I went unconventional on this project and dyed the drapes myself in the washing machine. [Don't worry- I have experience. The first washing machine dye job I did was on part of my wedding dress. Way to start safe, huh?] So as of a few weeks ago we had grey walls and grey drapes.


Living room in progress


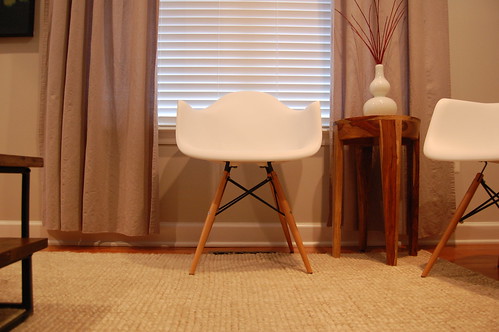
Except now I had another problem- shrinkage. Major drape shrinkage. Look at how terrible that is! Dying them in hot water in the washing machine caused them to shrink to different lengths. High-water drapes are so not in our design scheme. So while at Ikea this weekend I purchased a dark grey curtain panel, cut it into sections, hemmed the sections, and then attached to the current drapes. Voila!


Living room after


Not only do they look like fancy custom made drapes (because they are!), but this project was completed for a tiny price- many hours of work, some RIT dye, and one Ikea curtain panel. Even Husband (who is normally not so gung-ho about my 'happy hands at home' crafty projects) has said again and again how great these turned out.

I am on a drapery roll- next up 'custom' drapes for Baby Biscuit's room. Anyone have other ways to dress up, redesign, or repurpose old curtains?

Monday, December 20, 2010

Christmas Crafting

Decorating for Christmas is a big deal at our house. Not because we go all out, or because we buy tons of new things every year, but because Husband and I both enjoy it and we especially love building on what we've done in years previous.

This week I found a great little tutorial for Crochet Chain Christmas Trees at Seams of Life. I whipped up a few of these before a Christmas party we had yesterday, and I think they add a nice pop of color to our dining room table. Last week Husband crafted (can you believe it?) this card tree. A simple branch from the back yard, a vase we already had, and some binder clips and tape and voila! A beautifully simple way to display our Christmas cards [except... we had 1 inch of snow last week. No one can drive in the snow here. Someone took out our GIANT bank of neighborhood mailboxes and now we can't get any mail until it returns. Hrmphf!]

Christmas Centerpiece Card Tree


So, those are our little addition to the decorations this year. Do you have any last minute projects to add to your holiday displays?

Welcome Back

Long time no see, blog world. It's been basically 9 months since I have touched this blog. Don't worry, I have thought about you many, many times. But life got in the way, and the blog was pushed to the bottom of the list.

So, what has happened in the past 9 months? Oh man, a LOT. We bought our first house, and moved in April. That was an ordeal, a happy ordeal, which included buying new furniture, painting, more painting, and spending a nice amount of time decorating our new home.

Another first at our house... first baby is on the way! This has been the biggest change in the past nine months, and probably the biggest reason why the blog has fallen aside. Mama's got work to do! I have been planning, researching, sewing, crafting, and sleeping (oh, there is a lot of sleeping), in order to prepare for Baby Girl's March arrival. Husband and I are over the moon. Can't wait to show you all that we have done for her so far. Also can't wait for the blog to take on a new aspect... my little soapbox about natural birth and attachment/gentle parenting.

What else? Oh, little things like changes at work, a huge water leak at the aforementioned new house, trips around the country for weddings of friends and family. But things seem to be calming down and I am excited to share my life with all of you again.

Sunday, March 7, 2010

Pillows

It has been a hectic, frenzied time at our house... Husband and I are making the leap into home ownership and when I say leap, I mean LEAP. One day of house hunting set the ball rolling for a super quick chain of events. We're still in the middle of it, but if everything works out, we'll be in our new house in early April! As stressful as it can be at times (especially because I tend to be the level-headed one around our house...), I just keep telling myself, "sewing room. sewing room. sewing room." I can't wait!

We have had a few nice additions to the current living room recently. First up is this gorgeous pillow (and it's mate) made by Amanda for the BTRS swap.


I don't know how she managed to cross an ocean, sneak into our house, record the exact Pantone numbers of our other couch pillows, and then create these beauties... but she did. And I am totally impressed and we LOVE THEM.

We saw some more great pillows at a wonderful little store called White Bench in Middleburg, VA. Although, I didn't necessarily love the price. I said what I always say, 'I could make that!', and this time, I actually did. The store version had a bit more going on, visually. I feel like this needs something on the right side. Any suggestions?


The pillow is unbleached cotton fabric, freezer paper stenciled bird, and sewn on branch (Amy Butler Midwest Modern 2, Ripple Stripe in Rust). I added the blue trim; it was purchased as part of a grab bag from a church garage sale two years ago and is 50 year old bias binding. (I am really getting my $1 worth for that purchase!) Yes, the insert needs to be stuffed a bit more, but I really like it and it emerged from the sewing machine just as I had pictured in my head.

Next up... angeling pillows for Becca from the BTRS Swap.

Friday, February 19, 2010

Waste Not, Want Not


'WNWN' is a total cliche; but it has definite weight when I hear it. This plate is from the collection of the St. Louis Art Museum, and it is 300-400 years old (can't remember dates), so we know that the phrase has been around for awhile. Do I think that 400 year old wisdom has helped us? Ehh... maybe not.

I am lucky enough to live in a place and have the means to go out and get a lot. I say 'a lot' meaning both many different things and great quantities of things. And in obtaining so much, I think things really loose their value. We live in such a disposable culture (get stuff, get tired of it, get more) and I want to really fight that mentality. I want to treasure what I have, utilize items to their fullest, and think before getting more. Not only is this a more centered or thoughtful way to live, it is also a 'greener' practice.

At our house, the area that plagues me the most is food. Too bad I don't have a set of WNWN dishes to keep this thought in the forefront! I have a pantry full of food. I have a fridge full of food. I have a freezer full of food. Yet we eat out a lot and let a lot go to waste. This is not what I want for my family.

What do I want for us? Healthy, local meals that taste good and nurture our bodies. My wasteful consumption definitely gets in the way of that goal! What can we do to get what we want? Plan meals, be willing to work (i.e. skip fast food, go to the farmer's market instead of the local big box grocery) for our meals, and use the left-overs afterwards. I look forward to being a better steward of what I have, and in turn, being able to provide my family with healthier and better meals.

What do you want? How is waste getting in the way of getting what you want?

Monday, February 15, 2010

Matthew's Baptism Quilt

Yesterday I finished this quilt for a new little friend of ours. Matthew was born in December and baptized yesterday. I started this quilt before he was born and both finished and gifted it to the family yesterday. It is a stacked coin pattern of Moda Oddysea fabric. The back is blue snuggle flannel finished with an embroidered image of yesterday's date and the baptismal shell. The polka-dot-esque fabric is actually a print of little seashells.

With every quilt I complete, I learn more and more and the process gets easier. I ironed open EVERY SINGLE SEAM on this puppy. Each and every one. And guess what, the quilt came together much neater and "stitching in the ditch" to quilt it was very simple. This one also has the best binding yet... all those hours of hand stitching that beautiful blue edge really paid off.


The embroidery was done and then attached to the backing before it was all quilted. Backstitch for the numbers and the lines of the shell, stem stitch for around the outside of the shell, and satin stitch for the water droplets (which signify God the Father, God the Son, and God the Holy Spirit). I really need to do more embroidery; I love the process and with just a bit of work you can create something beautiful.

Sunday, February 14, 2010

Pizza Delivery?

Note to self: if you are hungry, do not browse your Flickr photostream, as there are photos of Imo's Pizza.
I made sure to photograph our delicious lunch when we went during our St. Louis trip in December. Mmmmm..... Provel-y, saucy, square-y goodness. I am literally salivating at the thought of this pizza. I'll just let Wikipedia explain what all this is about. In the meantime, I might give Imo's a call to see how big their delivery radius is.

Tomorrow... the quilt I finished today. Yea!

LinkWithin

Related Posts with Thumbnails